Free Seating Chart and Floorplan Tool- An Intro Tutorial to AllSeated
Have you been searching for a free seating chart and floorplan tool to easily create your seating charts online? Look no further! Allseated.com is a free, easy-to-use website platform for creating digital seating charts and floorplans that are a cinch to edit and make ongoing changes.
Allseated.com: God’s gift to DIY brides and event planners! I don’t know how I would have planned out the floorplans for both my wedding reception and ceremony if I hadn’t used this free platform to digitally arrange everything without having to visit the venue.
As mentioned in a previous post, here is a basic intro to get you started with allseated.
#1 Create Event
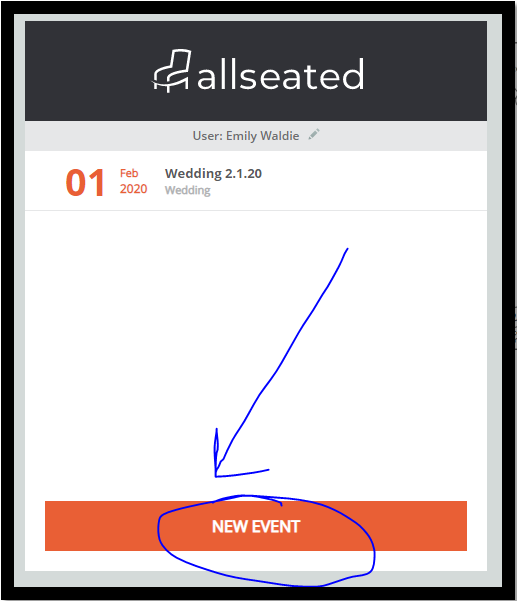
After you’ve created an account using your email address (it’s free), you’ll need to click the orange button and create a new event.
#2 Enter Event Details
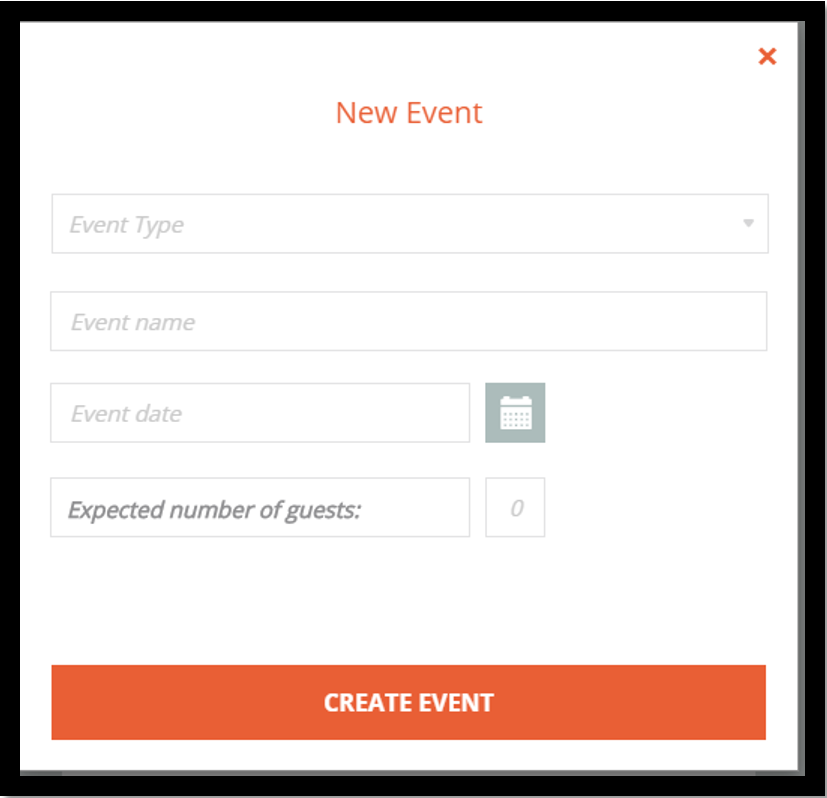
Enter the details of your new event:
-Select event type
-Create a name
-Date of the event
-Approximate number of guests
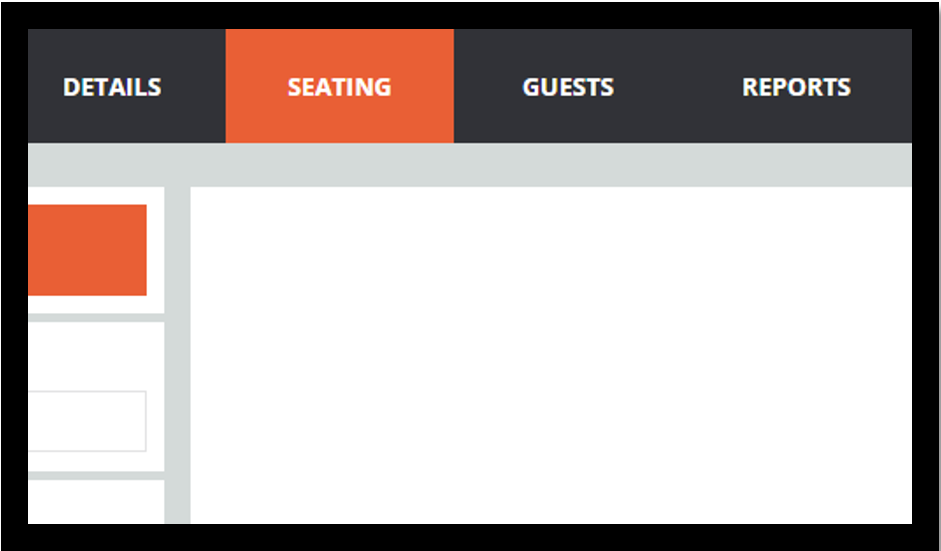
#3 Four Main Tabs
There are four main tabs at the top of the allseated dashboard.
1. Details – allows you to add vendors, other users, premade venues, etc.
2. Seating – This is where most of the planning takes place. Here you will create floorplans, add objects, labels, and measurements. This is where the design happens.
3. Guests – This tab allows you to enter all of your guests for your event. Stay tuned for a follow-up post focusing only on the “Guests” tab.
4. Reports – Allows you to export your data in the form of a report. You can filter by RSVP, meal type, and more.
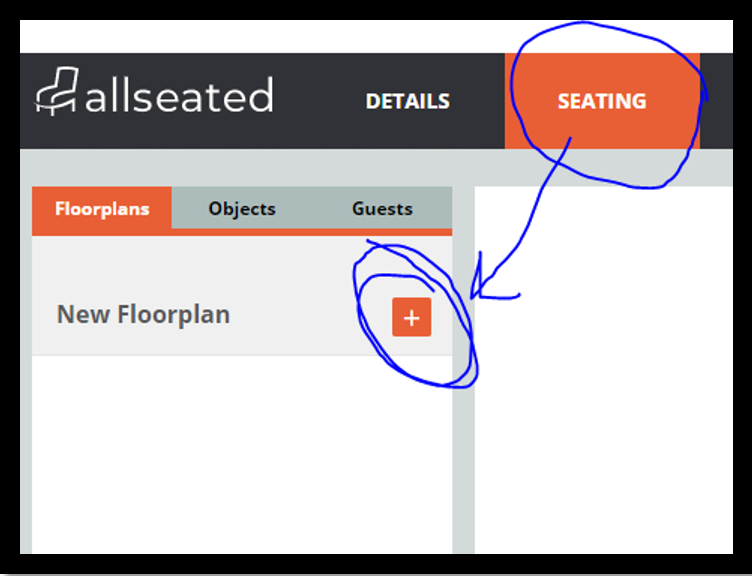
#4 Select Seating Tab to Create New Floorplan
The sub-tabs under the main “Seating” tab are:
-Floorplans
-Objects
-Guests.
Use the orange + button to create multiple floorplans.
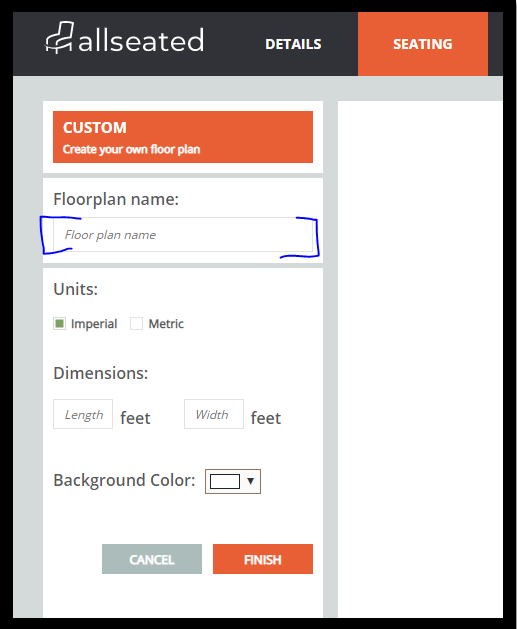
#5 Enter Floorplan Details
This includes:
-Floorplan name
-Dimensions of room
-Option to select color. I prefer to leave mine white, at least initially.
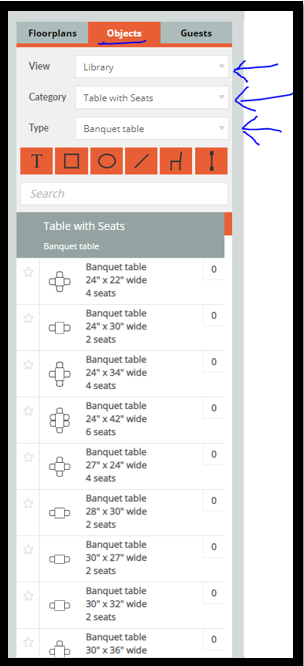
#6 Add Objects to Floorplan
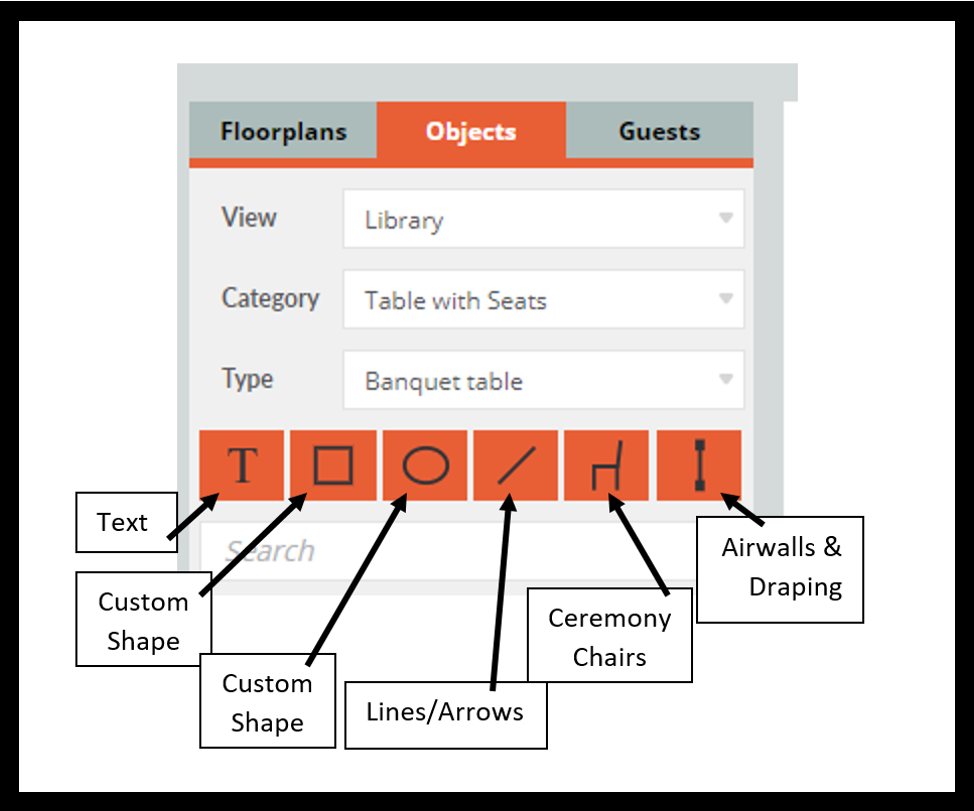
Under the “Objects” option tab, you have three pulldown menus to help you select the type of object you’d like to insert into your floorplan.
-View – The “Library” option gives you access to all types of objects.
-Category – You can select type of object you’re looking for here (i.e. tables, furniture, flooring, etc.)
-Type – Allows you to get even more specific (i.e. option to search tables by “round”, “oval”, etc.)
#7 Object Options
Under the “Objects” tab, you also have six different orange button options:
-Text, two types of custom shapes, lines, ceremony chairs, and draping/airwalls
#8 Edit Selected Objects
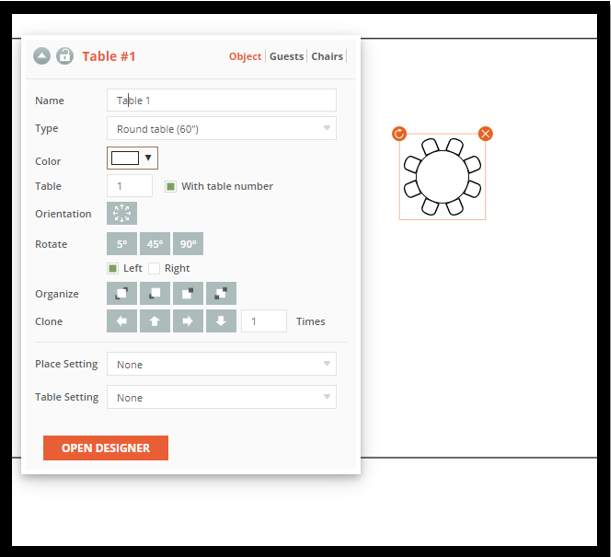
-Once you’ve placed an object onto your floorplan, you have several editing options when an object is selected. Here are the basics:
-Name (allows you to label your object)
-Color
-Table #
-Clone option that automatically copies and pastes the selected item in the direction of whatever arrow you select.
-Additional detail options like place and table settings.
Play around with the platform and I think you’ll find that it’s pretty intuitive and easy to learn!
Thanks for checking out
Free Seating Chart and Floorplan Tool- An Intro Tutorial to AllSeated
Feel free to post your comments/questions below and let us know what you think about our intro tutorial to AllSeated.
Check out our other AllSeated tutorials that will help you assign seats for your guests, use the ruler to measure exact room and object dimensions, and create additional details like place settings and meal assignments!

Want to stay updated on posts? Choose your type of content. We’ll never send you spam!
