Gold Foil Vellum Overlays for Wedding Invitations – DIY Tutorial in 4 Easy Steps!
Gold foil is the epitome of wedding invitation class, am I right? It’s also the epitome of costly wedding invitations. Well not anymore! Learn how to do your own invitation foiling with a roll of heat reactive foil and a laminator! Here you are, you tenacious DIY Adventurer – the easiest DIY Tutorial: Gold Foil Vellum Overlays for Wedding Invitations!
Gather Your Supplies
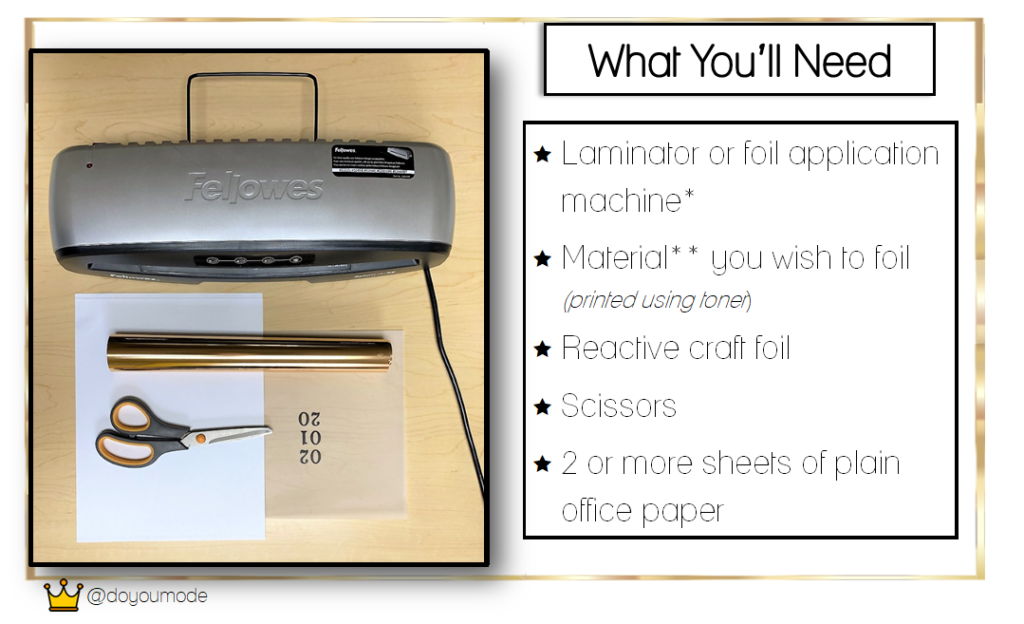
*Laminators are way cheaper and work just as well as a $150 foil machine
**To foil your printed image or text, it must be printed in toner (powder –like substance), not printers that use ink cartridges. It absolutely will not work on material printed with ink—don’t waste your time trying.
Tips & Tricks
— Make sure your foil is reactive foil—the kind that heat activates. Minc is one brand that sells a wide variety of reactive foil. You can find their products on Amazon (we’re not affiliated with Minc in any way).
— We’ve found that foil applies best right after you print (using toner—see below). If this isn’t feasible for you, no worries. Just try to apply foil within the same day you’ve printed the image (however, it will still foil at any point after printing).
— Usually, running the foil through the laminator two times is best. One tends to not be enough and three is too much—in both cases we’ve found that the foil doesn’t apply as smoothly and fully as running it twice. This may differ depending on how porous or thick your material is, so experiment before you settle on a method.
#1 – Set Up Your Workspace
1. Set your laminator to 5 mil, or the hottest temperature setting.
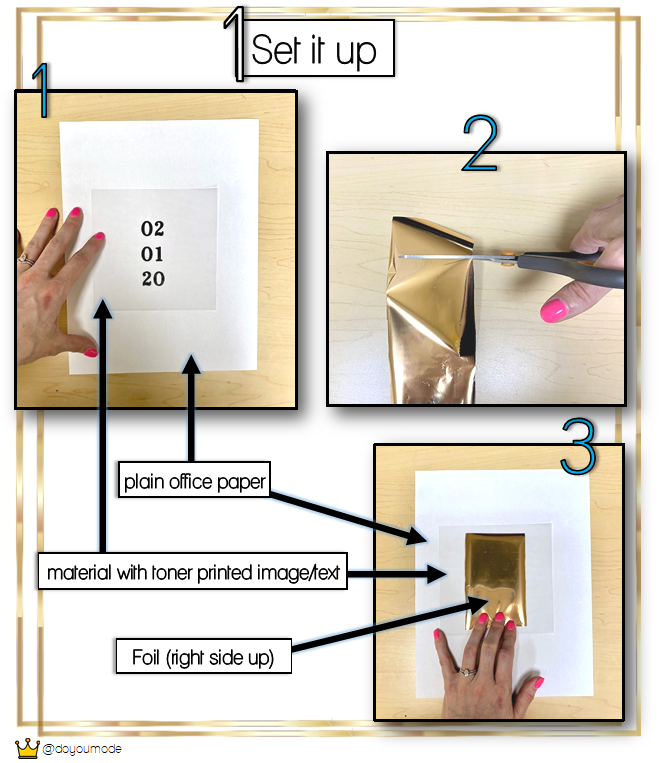
2. As it warms up, prep your material. Start by placing your material (“material” in this tutorial will refer to whatever paper you’re trying to foil) on top of a white piece of copy/office paper (colored paper may bleed so use white if you can).
3. Cut your foil to desired size (make sure it can cover the entire area you want foiled) and place on top of your printed image or text, right side up.
#2 – Feed Vellum Into Laminator
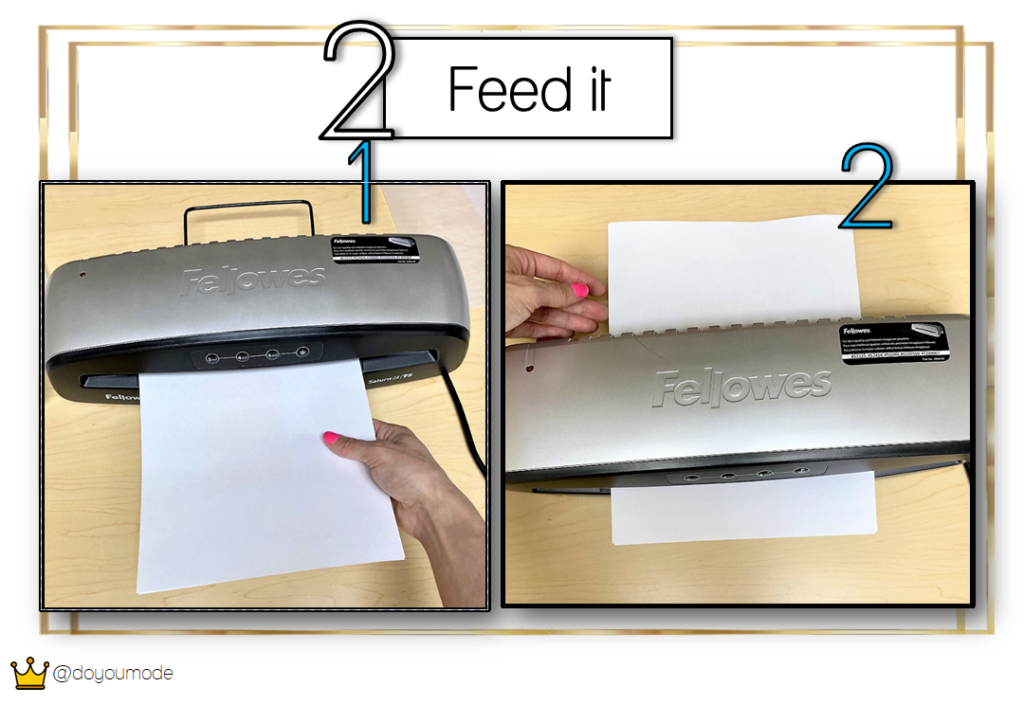
1. Gently place a second sheet of copy paper on top of the material and foil, being sure not to move the foil off of your printed image.
2. Your material and foil should be sandwiched between two cover sheets of plain paper. Now, feed it into the laminator.
3. Once it passes through, feed it right back into the laminator* again, keeping the same side up and being sure not to displace the material and foil.
*Be sure to read “Tips & Tricks” (above) to see if you may need to adjust the number of times you run it through the laminator.
#3 – Peel off Gold Foil
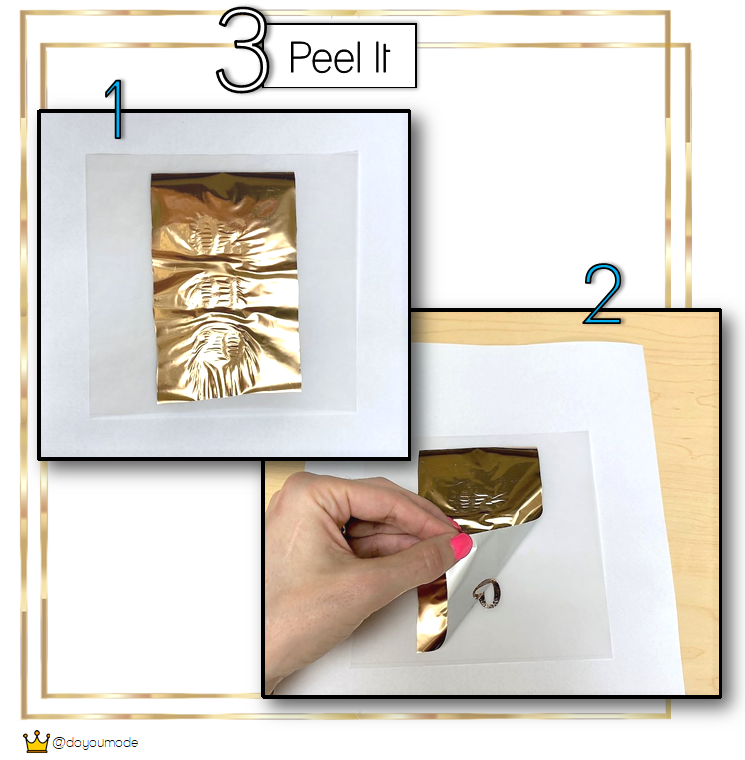
1. After the final laminator run, remove the top cover sheet. The foil will appear stuck to the page.
2. Gently peel off the foil layer to reveal your newly foiled material. Pro tip: It works best if you peel the foil off right after the final laminator run, while it’s still warm.
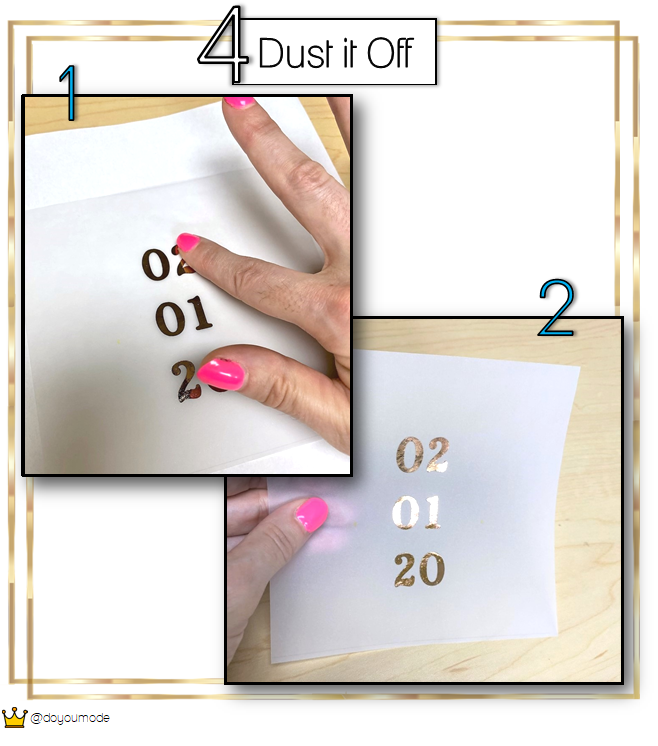
#4 – Dust Off Vellum Overlay
1. Gently brush off the foiled area to remove any remaining loose foil pieces.
2. Voila! Foiled like a pro!
Wow right? It really is that easy. This method works for foiling any type of paper–just be sure you’ve printed using toner and not ink. If you find your foiling isn’t turning out perfectly, experiment with your method and consider altering:
1. Heat of your laminator or
2. How many times you run the foil through the laminator and
3. Ensure you’re peeling the foil off right after you run your paper through the laminator for the last time.
Want to foil but don’t have a vellum or DIY invitation design? Check out our invitation templates! Multiple printable designs for vellum overlays are included in each template!
We’d love to hear from you! What did you think about
DIY Tutorial: Gold Foil Vellum Overlays for Wedding Invitations
Do you have any other tips for DIY Foilers? Share below in the comments. Thanks for checking out DIY Tutorial: Gold Foil Vellum Overlays for Wedding Invitations!

Want to stay updated on posts? Choose your type of content. We’ll never send you spam!
