The super simple DIY Tutorial for Cutting Perfectly Straight Lines by Hand
Who can really cut perfectly straight with a pair of scissors? We sure can’t! When you’re crafting something with little room for error, toss your scissors for a good craft knife and a ruler. You’ll never cut crookedly again. We give you: The DIY Tutorial for Cutting Perfectly Straight Lines by Hand.
This tutorial will show you how to cut paper items by hand with ruler and craft knife—our recommended method for cutting out your own place cards, invitations, and more. You can also try a manual paper cutter that has a pull-down blade or rolling blade.

What You’ll Need:
Craft knife or Xacto Knife
Ruler
Cutting board or hard surface to cut on
Directions
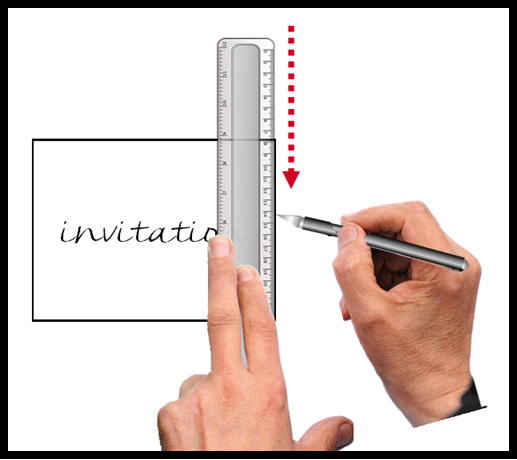
1. Line up ruler with outside edge of invitation.*
2. Line up your craft knife against the ruler at the top where you want to slice.
3. Slice downward, holding the ruler steadily (and safely) in place with your other hand, using the ruler as a guide for a perfectly straight cut.
*Because it’s much easier to make accurate cuts with lines to go by, we recommend printing your item with a border (if possible) so you can line up your ruler easily. If you don’t want the border to show on your final product, line up your ruler so that you make your cut along the inside edge of the printed border.

That’s it! It’s that simple.
Need a good craft knife? You can find our favorite one here for less than $10!
Let us know what you thought about our
DIY Tutorial for Cutting Perfectly Straight Lines by Hand
If you’d like a printable/downloadable version of this post, go to our Free Downloads page or click here: DIY Tutorial for Cutting Perfectly Straight Lines by Hand.

Want to stay updated on posts? Choose your type of content. We’ll never send you spam!
