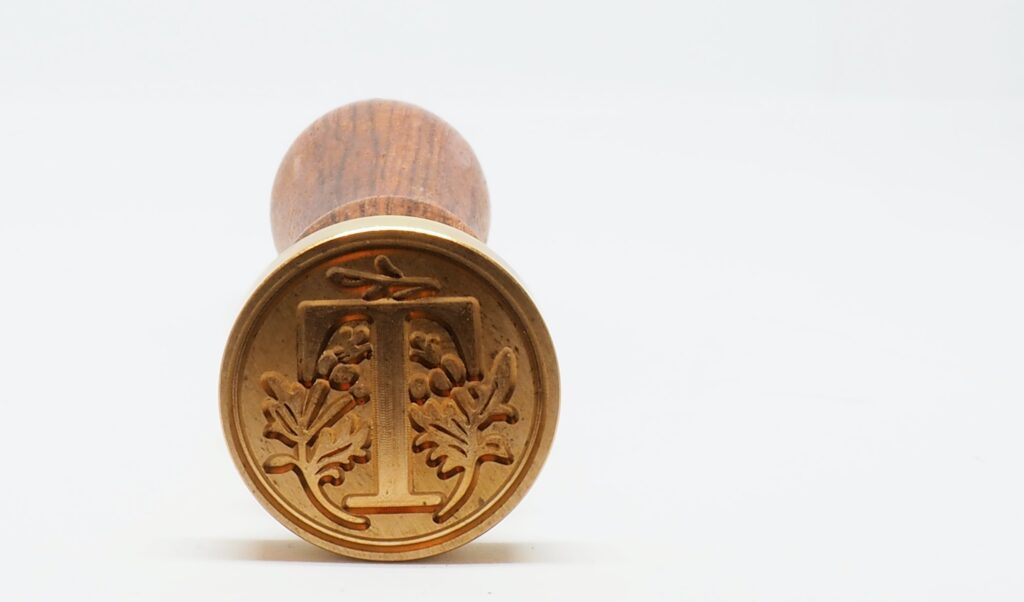
Wax and Ribbon Belly Bands for Invitations – A DIY Tutorial in 7 Easy Steps!
Transform your invites in just a few steps. Replacing the inner envelope, a belly band made of beautiful ribbon will kick your invitations up a notch! Your guests will think they were professionally made. Find a custom wax stamp (Etsy and Amazon are great places to look) and you’ve got yourself some luxe stationary! Check out the easy-to-follow picture tutorial below –DIY Wax and Ribbon Belly Bands for Invitations in 7 Easy Steps!
What you need:
- Ribbon of your choice
- Wax stamp of your choice
- Scissors
- Wax paper
- Glue gun
- Wax sticks (made for glue guns)
- Invitation Suite
Prior to beginning:
– Cut a small piece of wax paper to lay over top of your invitation suite.
-Turn on your glue gun to lowest setting
#1 – Wrap It
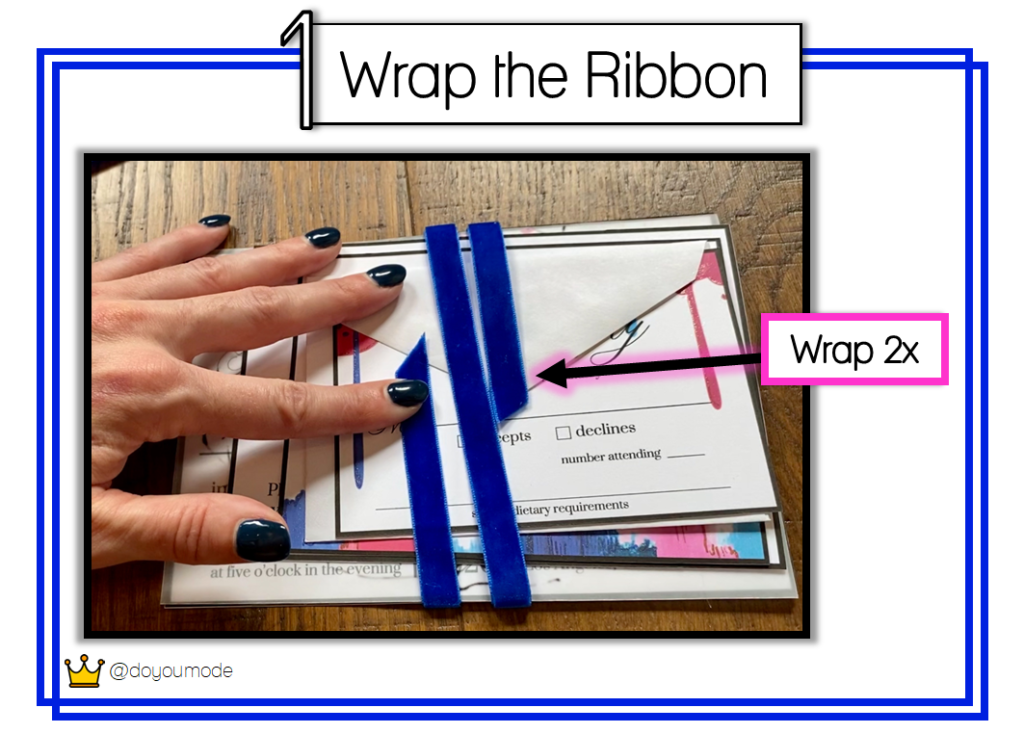
1. Lay out your invitation suite horizontally.
2. Wrap a piece of ribbon around your invitation suite two times. You can find the ribbon used in this tutorial here.
#2 – Cut It
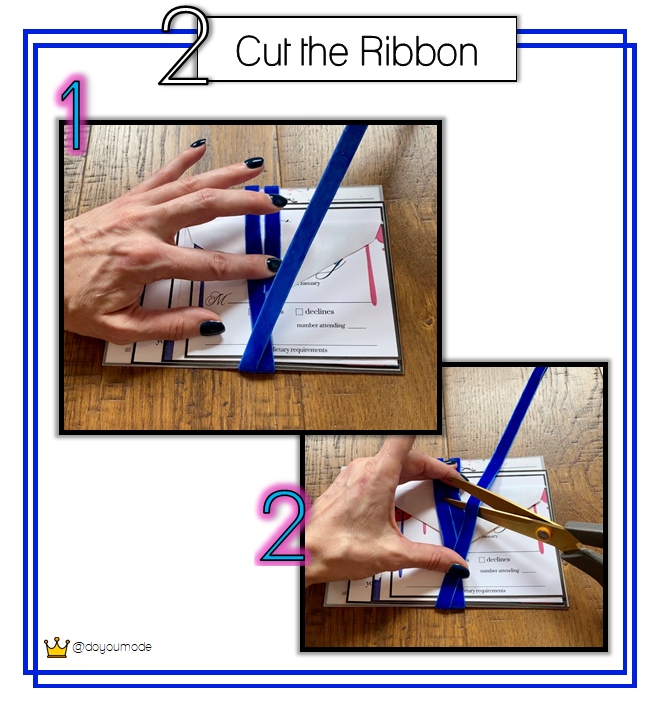
1. Pinning one end of the ribbon with your finger, cut the other end so that there’s a small overlap between each end of the ribbon (as pictured in Step 1).
#3 – “X” It
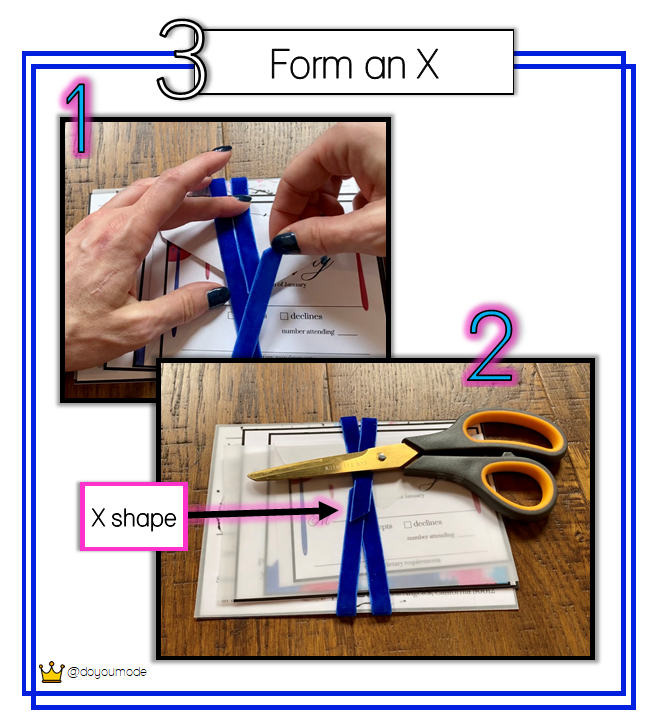
1. Forming an X, overlap the ribbon ends and place your scissors on top to hold in place, leaving space in the middle of your X.
#4 Wax It
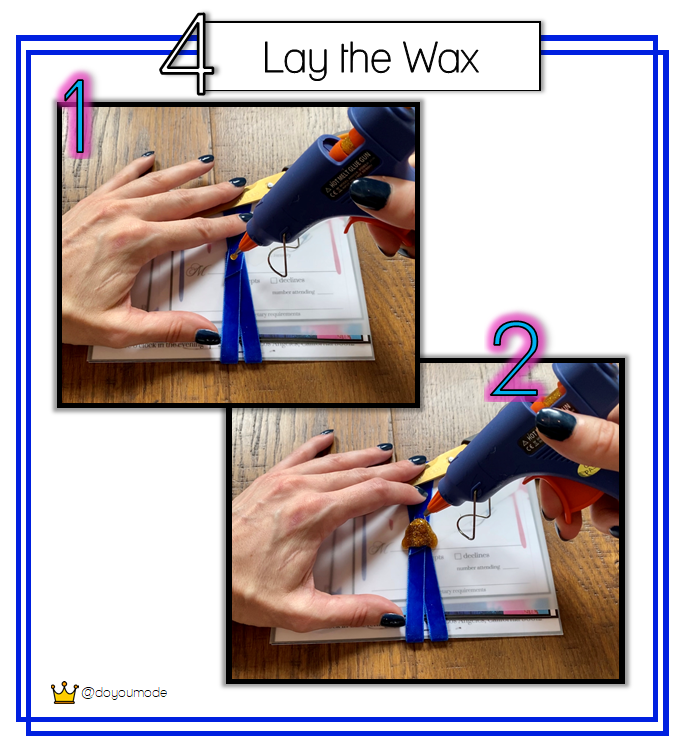
*Make sure you have your wax paper cover sheet on top of your invitations prior to applying hot wax!
1. Keeping your ribbon in an X shape, slowly start to release wax right in the middle of your X.
2. Continue releasing wax in the center of your X. Stop when you have enough to form a wax seal – about the size of a quarter.
You can find the gold glitter wax used in this tutorial here. If you’re looking for a more classic colored wax, we also love these wax sticks.
#5 Stamp It
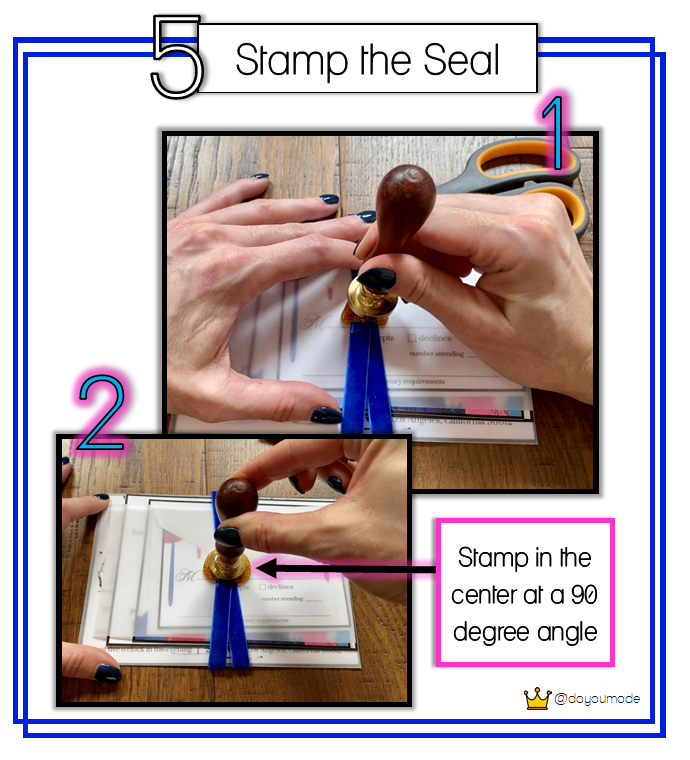
1. Center your wax stamp over your melted wax.
2. Gently place your stamp on top. Come straight down over the wax so the entire surface of the stamp makes contact with the glue at once. Press gently to flatten the wax and create your seal.
#6 – Remove It
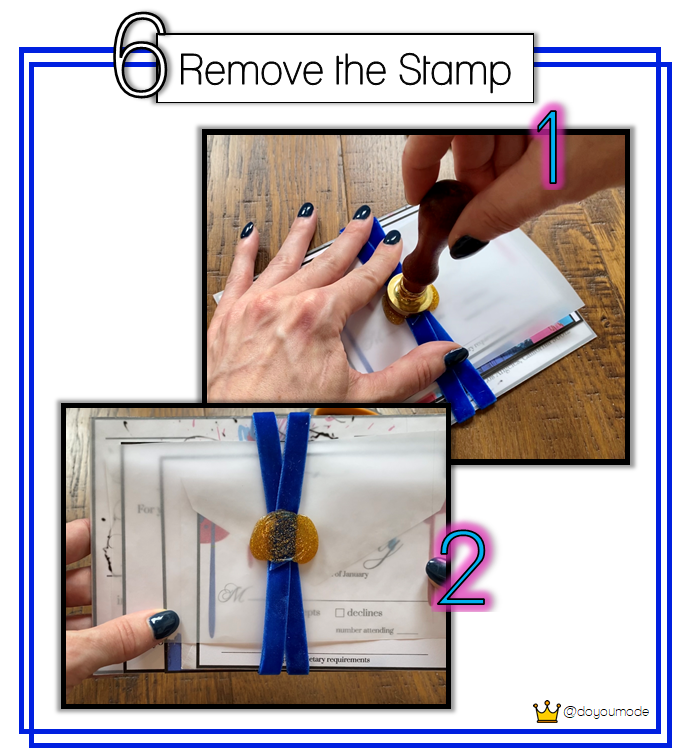
1. Let the wax cool for about 30-60 seconds.
2. Gently lift your stamp. You may need to slightly wiggle your stamp side to side to release it from the wax. If you’re having difficulty removing the stamp from the wax, you can rub a small amount of olive oil (or any cooking oil) prior to pressing it into the hot wax. The stamp will pop off much easier. Just be careful not to put too much oil to prevent it from bleeding through your top sheet and staining your invitations
#7 Finish It
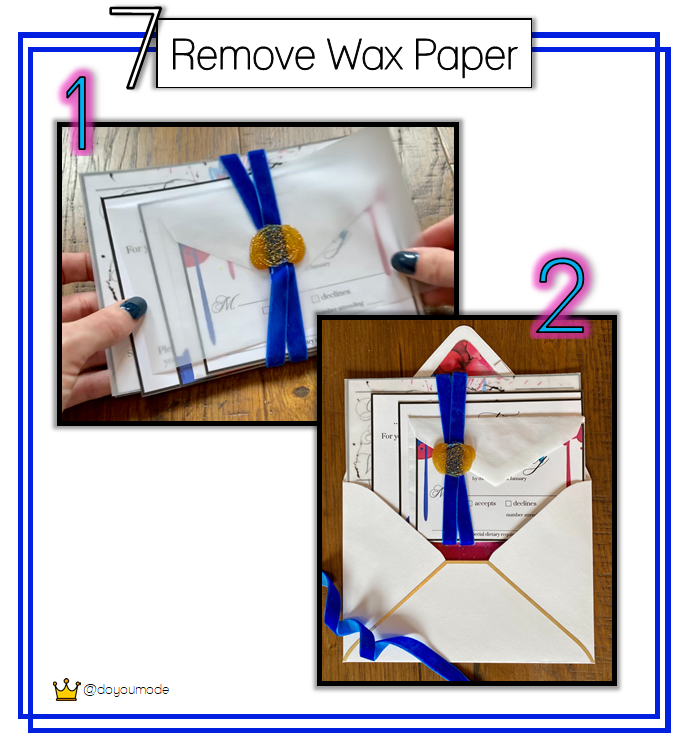
1. Carefully remove the wax paper cover from your seal. You’re done!
*If you need to, you can gently use a paint scraper or other wedged tool to separate the wax seal from the wax paper.
Thanks for reading DIY Tutorial: Wax and Ribbon Belly Bands for Invitations in 7 Easy Steps!
What did you think about this post? Check us out on instagram @doyoumode for other DIY ideas and inspiration. We’d love to hear your comments below!
DIY Tutorial: Wax and Ribbon Belly Bands for Invitations in 7 Easy Steps!

Want to stay updated on posts? Choose your type of content. We’ll never send you spam!
